

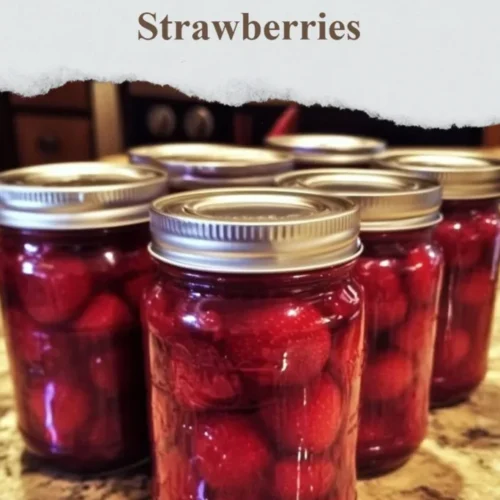
Homemade Canned Strawberries
Canning Made Easy: Your Go-To Recipe for Homemade Canned Strawberries
Ah, strawberries—their sweet, rosy presence alone can brighten even the cloudiest of days. If you’re like many busy women juggling work, family, and life in general, you’re often on the lookout for quick, simple, and delightful ways to make your favorite flavors last beyond the fleeting summer months. So, let’s dive into the wonderful world of preserving! Today, I’m excited to share my recipe for Homemade Canned Strawberries. Trust me, once you try it, you’ll feel like a canning pro in no time, and your pantry will be flooded with jars of sunny strawberry goodness all year round.
Why You’ll Love This Homemade Canned Strawberries Recipe
This recipe is all about infusing your kitchen with the essence of summer while saving time and effort. With just a handful of ingredients and some basic canning techniques, you can create a delicious treat that’s perfect for topping on pancakes, stirring into your morning yogurt, or simply savoring straight from the jar. Plus, there’s something incredibly satisfying about preserving food at home—it’s like giving a little high-five to your future self when you crack open a jar in the dead of winter.
Ingredients You’ll Need
Before we start, let’s gather the essentials for our delightful Homemade Canned Strawberries.
- 2 quarts of fresh strawberries (You know the ones—ripe, juicy, and begging to be picked!)
- 2 cups of granulated sugar (Feel free to adjust based on your sweetness tolerance; we all have our sweetness thresholds!)
- 2 cups of water (And for added fun, you could replace some of this with fruit juice for a zing!)
- 1/4 cup of lemon juice (Because nobody wants overly sweet—it’s all about balance, my friends.)
- 1/4 teaspoon of salt (This helps to enhance those flavors, just like the perfect pinch of love!)
Steps for Making Homemade Canned Strawberries
-
Prep Your Strawberries: Rinse those beautiful berries under cool water. Remove the green tops, and slice them in half. If they’re extra large, quartering them might be your best bet!
-
Make the Syrup: In a medium saucepan, combine the water, granulated sugar, lemon juice, and salt. Bring it to a gentle boil, stirring occasionally until the sugar dissolves. This sugary elixir will enhance the sweetness of our strawberries, making them even more irresistible!
-
Pack Those Jars: While your syrup is bubbling away, it’s time to prepare your canning jars. Make sure they’re thoroughly cleaned and sanitized (yes, we want them as fresh as those berries!). Pack the sliced strawberries tightly into the jars, leaving about 1/2 inch of headspace at the top. This is where the magic is going to happen!
-
Pour the Syrup: Take that delicious syrup off the heat and carefully ladle it into the jars over the strawberries. Make sure to cover them completely, leaving a little headspace (that’s the space between the top of the liquid and the top of the jar).
-
Seal the Deal: Wipe the rims of the jars with a clean cloth, then place the lids on and screw the rings on – not too tight, just snug. It’s like tucking your berries in for a cozy nap!
-
Water Bath: Prepare a water bath canner or a large pot with enough boiling water to cover the jars. Process your jars for about 10-15 minutes. This step is critical for sealing the jars safely and keeping those strawberries fresh and fabulous.
-
Cool and Store: Carefully remove the jars from the water bath and let them cool on a towel or cooling rack. When cooled, you should hear the satisfying “pop” of the lids sealing. These little beauties can be stored in a cool, dark place for up to a year!
Cooking Tips for the Perfect Canned Strawberries
-
Choose the Right Berries: Ripe strawberries work best, so don’t be shy—hit that local farmer’s market! And please, avoid the mushy ones; your future self will thank you.
-
Adjust Sweetness: If you’re trying to cut back on sugar, consider using honey or a sugar substitute in your syrup.
-
Add a Twist: Want to mix things up? Try adding a cinnamon stick or a sprig of fresh mint to the syrup for a unique flavor twist!
Personal Story: A Family Tradition
Canning strawberries is not just a recipe for me; it’s a cherished tradition I share with my sister Patricia. I vividly remember our carefree childhood afternoons spent picking bushels of these berries, racing to see who could collect the most! Now, as adults, we often find ourselves reliving those moments in the kitchen. It’s a wonderful way to connect and share stories, and honestly, it’s a sneaky way to eat half the strawberries before they even make it to the jars!
FAQs About Homemade Canned Strawberries
Can I use frozen strawberries for this recipe?
While fresh strawberries provide the best taste and texture, you can use frozen if necessary. Just make sure they’re thawed and well-drained before using!
How should I store uncanned strawberries?
Keep them in the fridge, unwashed, for a few days until you’re ready to can them; but try not to wait too long—those sweet berries won’t last forever!
By now, I hope you’re feeling inspired and ready to tackle some Homemade Canned Strawberries! It’s a delightful way to capture that summer flavor, and it elevates everything from breakfast to desserts. So, gather your strawberries, put on your favorite apron, and let’s get canning! I can’t wait to hear about your creations. Here’s to flavorful jars filled with love—enjoy every spoonful!
Meta Description: Homemade Canned Strawberries are the perfect recipe for preserving sweet summer flavors. Quick, easy, and delicious, this dish will liven up your pantry!
Homemade Canned Strawberries
Ingredients
Main Ingredients
- 2 quarts fresh strawberries Ripe, juicy strawberries are best.
- 2 cups granulated sugar Adjust based on sweetness preference.
- 2 cups water Fruit juice can be used for additional flavor.
- 1/4 cup lemon juice Balances the sweetness.
- 1/4 teaspoon salt Enhances flavors.
Instructions
Preparing the Strawberries
- Rinse the strawberries under cool water, remove the green tops, and slice them in half. If they are very large, quarter them.
Making the Syrup
- In a medium saucepan, combine water, sugar, lemon juice, and salt. Bring to a gentle boil, stirring occasionally until the sugar dissolves.
Packing the Jars
- Prepare and sanitize canning jars, then pack the sliced strawberries tightly into the jars, leaving about 1/2 inch of headspace.
Pouring the Syrup
- Ladle the syrup over the strawberries in the jars, covering them completely and leaving a little headspace.
Sealing the Jars
- Wipe the rims of the jars with a clean cloth, place the lids on and screw the rings on snugly.
Water Bath Processing
- Process jars in a water bath for about 10-15 minutes to seal them safely.
Cooling and Storing
- Remove jars from the water bath, let them cool on a towel or cooling rack, and listen for the 'pop' of sealing.